Zombie Cheerleader Outfit & Makeup Tutorial
28 Aug 2018, 10:00:00

Are you still on the hunt for the perfect Halloween costume? Well, we’ve got two words for you. Zombie Cheerleader!
We’ve got everything you need to make this gory getup a reality, from finding the perfect outfit to a step-by-step makeup tutorial that will really complete the look!
Get the perfect outfit
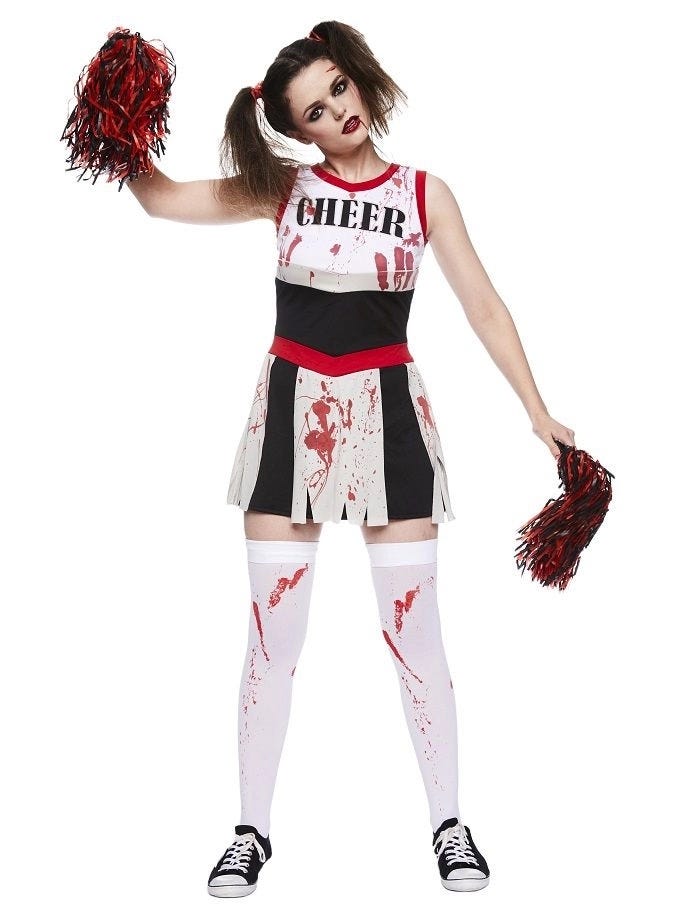
First things first, this zombie cheerleader costume really looks the part, plus it comes with black and red pompoms for you to wave around!
As for your footwear, these bloodstained stockings are a good start, and if you own a pair of Converse or similar trainers, these will do fine.
Put your hair in messy pigtails
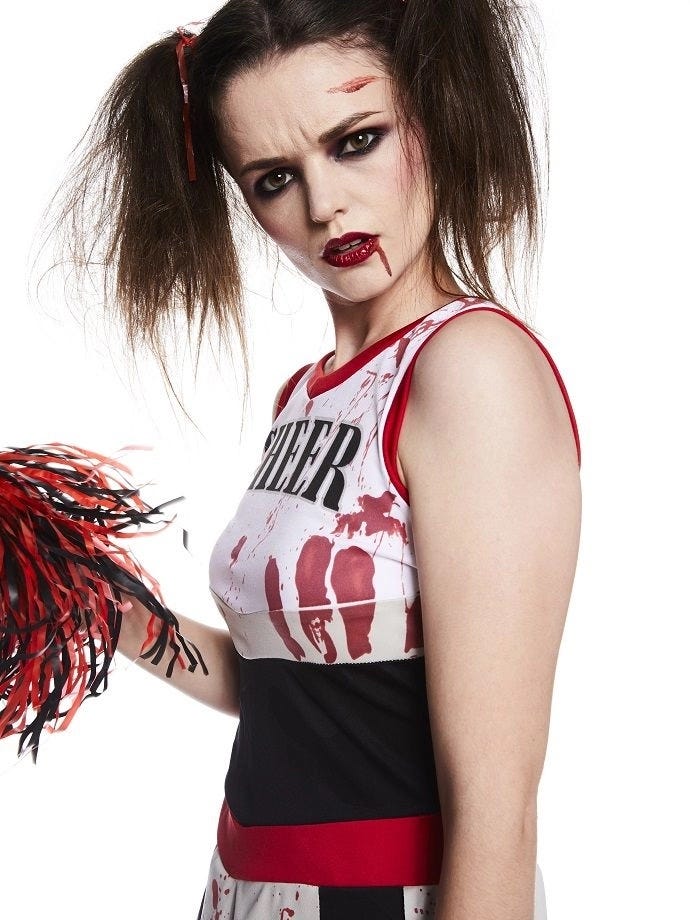
Next, the hair! The messier the better, so scruff things up with a bit of backcombing, then split it into two high pigtails.
If you have some red bobbles or ribbons that match your dress, these will work great, but whatever you have spare will be fine too.
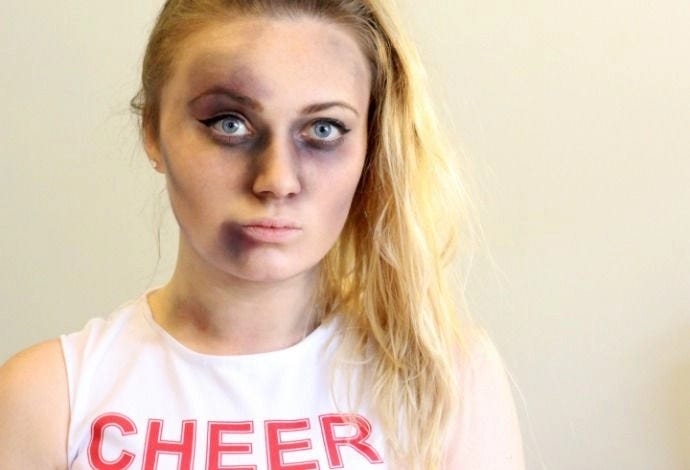
Add gruesome zombie makeup
Here’s beauty blogger Beky Lou to show you how to get your zombie makeup absolutely perfect in just four easy steps!
Step 1
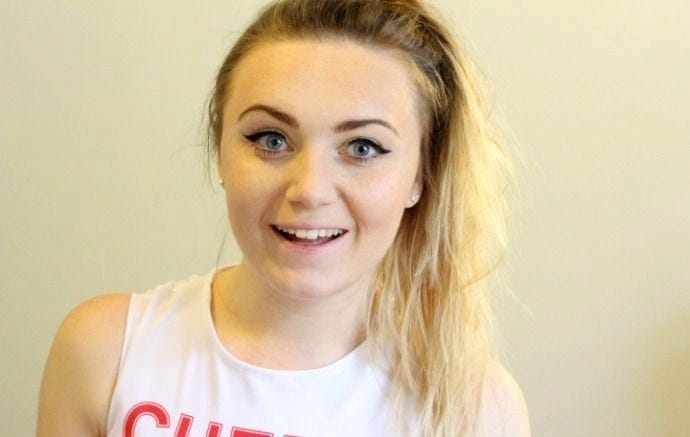
Apply a makeup base as you normally would. I’ve used my usual shade of foundation, made sure my brows are on point and contoured my face lightly – we’ll be going over that a lot later!
I also decided to add a little nude eyeshadow, then do a slightly thicker cat-eye than I normally would. I felt this was a rather classic look to go with for the base makeup.
At this point, you don’t really have to focus too much on getting it all perfect, as we’ll be messing it up quite a bit. Just as long as that flick is looking sharp!
Step 2
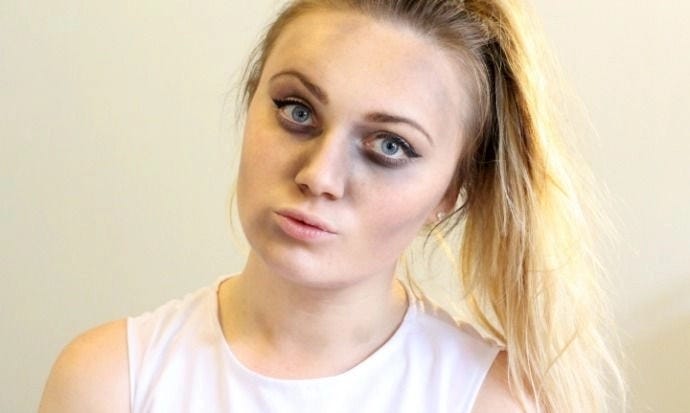
Now it’s time to get bruised up a little! For this, I’ve gone with a fluffy eyeshadow brush and a matte grey shade to roughly bruise under my eyes, around my nose and along the hollows of my face.
At this stage, I also grabbed a slightly larger blusher brush with a light matte brown eyeshadow to roughen up the contours of my face and make me look more bruised.
The main places to focus here are under the chin and eyes, to really emphasise the fact that you’re supposed to be dead. Don’t forget to also bruise up your arms and legs for a more realistic zombie effect!
Step 3
Here, I’ve gone for a little more detail using a matte red lipstick. For this one, I’ve used MAC Viva Glam 2, but any deep red will do. I’ve used my finger to lightly dab the product into the bruised areas.
I blended over this additional colour with a little more of the brown and grey, to make it all look a little less fake.
Then, I used the bigger blusher brush to drag some more shadowing down onto my collarbone, around the top of my forehead and onto my shoulders.
Next, I took a concealer that’s one or two shades lighter than I’d usually use. With a makeup sponge, I dabbed this into the un-bruised areas to make me look paler and more zombie-like. I also used this to cover my lips, as lighter lips wash out your face and make you appear less life-like.
Step 4

Last, but by no means least, I glued this barbed wire effect split scar to my neck and blended it in with the lighter concealer, along with some more grey and brown shadows.
I finished the look off with some fake blood around my mouth and dripping down from the scar, for a more dramatic effect.
Check out Beky Lou’s blog for more great tips or browse our Halloween costume shop for more Halloween costume inspiration.


